Physical Address
304 North Cardinal St.
Dorchester Center, MA 02124
Physical Address
304 North Cardinal St.
Dorchester Center, MA 02124

Keeping your cat healthy means paying attention to the small things, like the condition of their ears. Cleaning your cat’s ears safely keeps them free from wax, dirt, and potential infections. Most cats do a good job of grooming themselves, but sometimes they need extra help to keep their ears comfortable and clean.
It’s important to know when and how to clean your cat’s ears, as well as what signs tell you cleaning is needed. Using gentle tools and proper methods can make the process quick and safe. Learning the right way to do this can protect your cat’s hearing and keep them happy. For more details on cat ear cleaning, you can check a helpful guide from PetMD on how to clean your cat’s ears.
Cats often hide signs of ear problems, which can make it hard to tell when they need help. Regular ear care helps you catch issues early, keep your cat healthy, and avoid costly vet visits.
If you skip regular ear cleaning, dirt, wax, or debris can build up inside your cat’s ears. This buildup can create a perfect place for bacteria, yeast, and mites to grow. Ear problems may develop slowly, but once they start, they can be hard to fix.
Signs of neglected ear care include odor, redness, swelling, discharge, or constant scratching. These problems can cause pain and discomfort for your cat. Leaving dirty ears alone can even lead to hearing loss or balance issues in serious cases.
Simple regular checks and gentle cleanings can prevent small problems from turning into expensive medical issues. Staying on top of your cat’s ear hygiene helps you spot changes early and keeps your pet comfortable.
Keeping your cat’s ears clean supports their overall health and happiness. Clean ears lower the risk of infections, itching, and inflammation. Most healthy cats do not need frequent cleaning, but some need extra help if they have long hair, allergies, or a history of ear problems.
Benefits of routine ear care:
Following safe cleaning steps at home, like using a vet-approved ear cleaner and not using cotton swabs, helps keep your cat’s delicate ear tissue safe. For a step-by-step guide, you can read more in this complete guide on cat ear care.
Ear infections in cats are often caused by bacteria, yeast, or ear mites thriving in dirty ears. When you clean your cat’s ears routinely, you help remove the wax and debris that can trap moisture and germs. This makes it harder for an infection to start.
Regular cleaning also lets you spot early signs of an infection, such as foul smell or excessive scratching. Early detection makes treatment easier and less stressful for your cat. If your cat’s ears are persistently dirty or show symptoms like redness or discharge, cleaning alone is not enough—always check with your vet.
Careful ear cleaning as part of your cat’s grooming routine plays a big role in stopping infections before they begin. Protect your cat’s ears with gentle, regular care and watch for changes that may need a vet’s advice. Learn more about infection risks and safe cleaning in this veterinarian guide.
Cat ears are complex, with delicate features that make them sensitive to dirt, infection, and injury. Knowing their structure will help you clean your cat’s ears gently and avoid causing harm.
The outer part of your cat’s ear is called the pinna. This flap is covered with fur and can move to catch even the quietest sound. The pinna’s shape directs sounds into your cat’s ear canal. Healthy pinnae are soft, smooth, and free of debris or sores.
Look for any redness, swelling, or strong odor on the pinna. These are signs of possible infection or mites. The outer ear is important not only for hearing but also for protecting the more sensitive inside parts. Handle the pinna gently when you check or clean your cat’s ears to prevent discomfort.
The cat’s ear canal is different from a human’s. It is L-shaped, making it easy for debris to get trapped inside. The vertical part of the canal leads downward before it bends and goes inward toward the eardrum. This design helps protect the eardrum but also makes cleaning a challenge.
Because of this unique shape, it is very important not to insert cotton swabs or anything deep into your cat’s ear canal. Doing so may push wax or dirt further in or even harm the eardrum. Always focus on gentle, surface cleaning using products made for pets, as mentioned in guides like this one on how to clean your cat’s ears.
Keeping an eye on your cat’s ears is important for their health. Problems like ear infections or otitis externa can get worse if not noticed right away.
Look for signs like redness, swelling, or a bad smell coming from your cat’s ears. Healthy ears should look clean and pale pink without a strong odor. If you see dark brown or black debris, this could mean infection or ear mites.
Other common symptoms include:
If your cat seems to be in pain or their ears look different than usual, these could be early signs of otitis externa or another problem. Cats might also act more irritable or hide if their ears hurt. Paying attention to these changes helps you catch ear problems early.
For more signs and details, visit PetMD’s cat ear cleaning guide.
You should seek help from a veterinarian if you notice:
If your cat has already had an ear infection or otitis externa before, do not try to clean their ears at home without getting advice. Cleaning infected ears can make things worse.
Let a vet check your cat if symptoms keep coming back or if you see any serious changes. Early professional help can prevent lasting damage and help keep your cat comfortable. Learn more about when to see a vet at this vet-approved ear cleaning guide.
Cleaning your cat’s ears helps prevent infection, keeps your pet comfortable, and lets you find problems early. Gentle care, the right tools, and a calm approach are important for safe and effective cat ear cleaning.
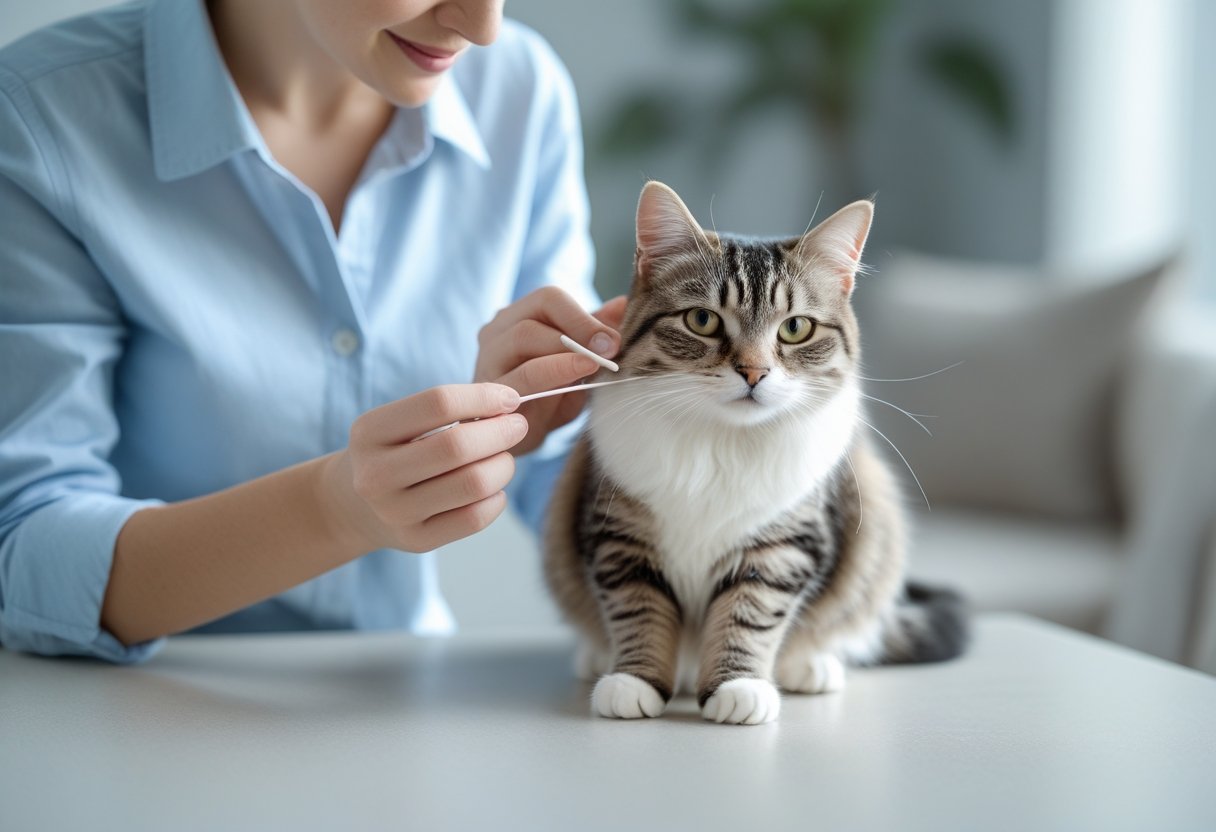
Before you start, gather all the needed supplies. You will need a cat-safe ear cleaning solution, cotton balls or soft pads, and a towel. Never use cotton swabs, as they can hurt your cat’s ear canal.
Choose a quiet place where your cat feels relaxed. If your cat tends to squirm, ask a friend to help by gently holding them. Wrap your cat in a towel to help keep them calm and still. This can help prevent sudden movements.
Wash your hands well before touching your cat’s ears. Read the label on your ear cleaning solution to make sure it is made for cats.
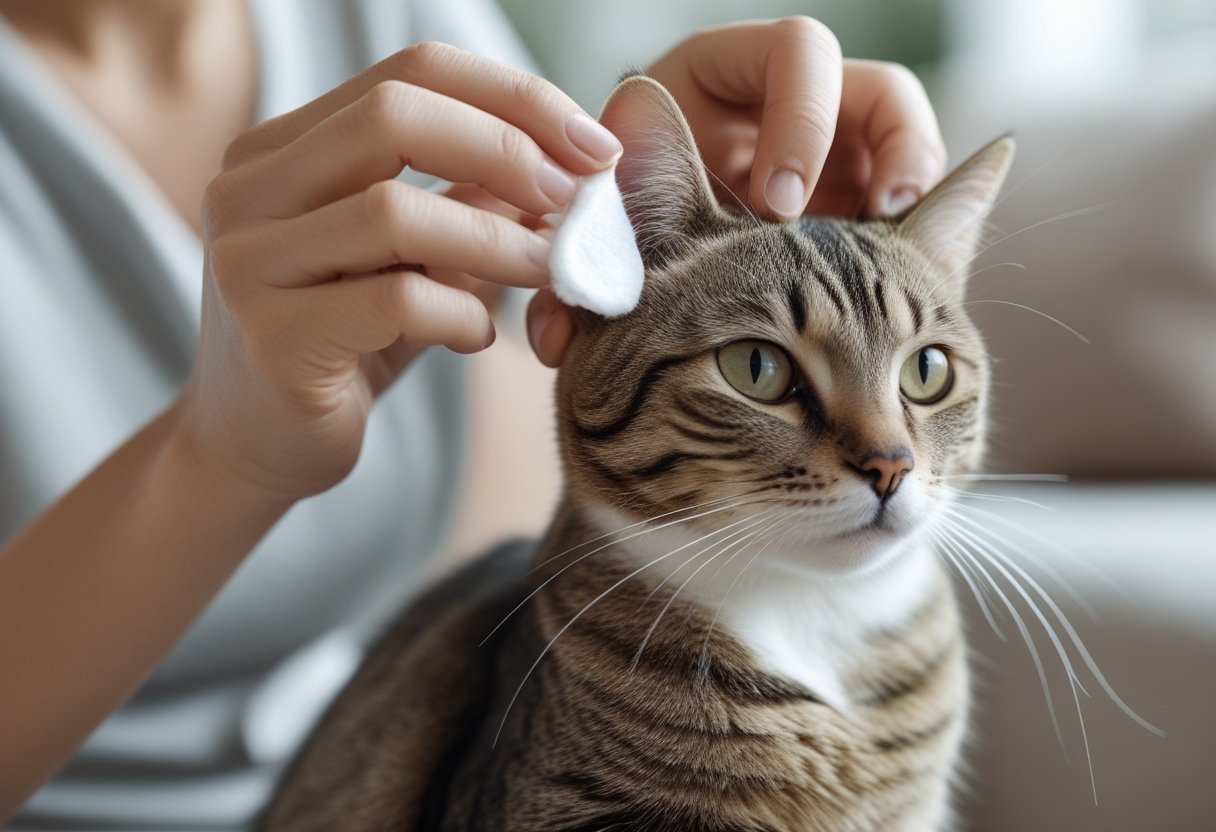
Inspect your cat’s ears carefully before you begin cleaning. Gently lift the ear flap and look inside. Healthy ears are pale pink with minimal wax and have no strong smell.
Look for signs of problems like redness, a dark brown or black discharge, swelling, or an unpleasant odor. These could be signs of an ear infection, parasites, or mites. If you notice any of these signs, do not clean the ears yet. Instead, contact your veterinarian for advice.
Use good light to help you see inside the ear. Be calm and gentle—talk in a soothing voice to help keep your cat relaxed during the inspection. If your cat shows signs of pain, stop and check with your vet.
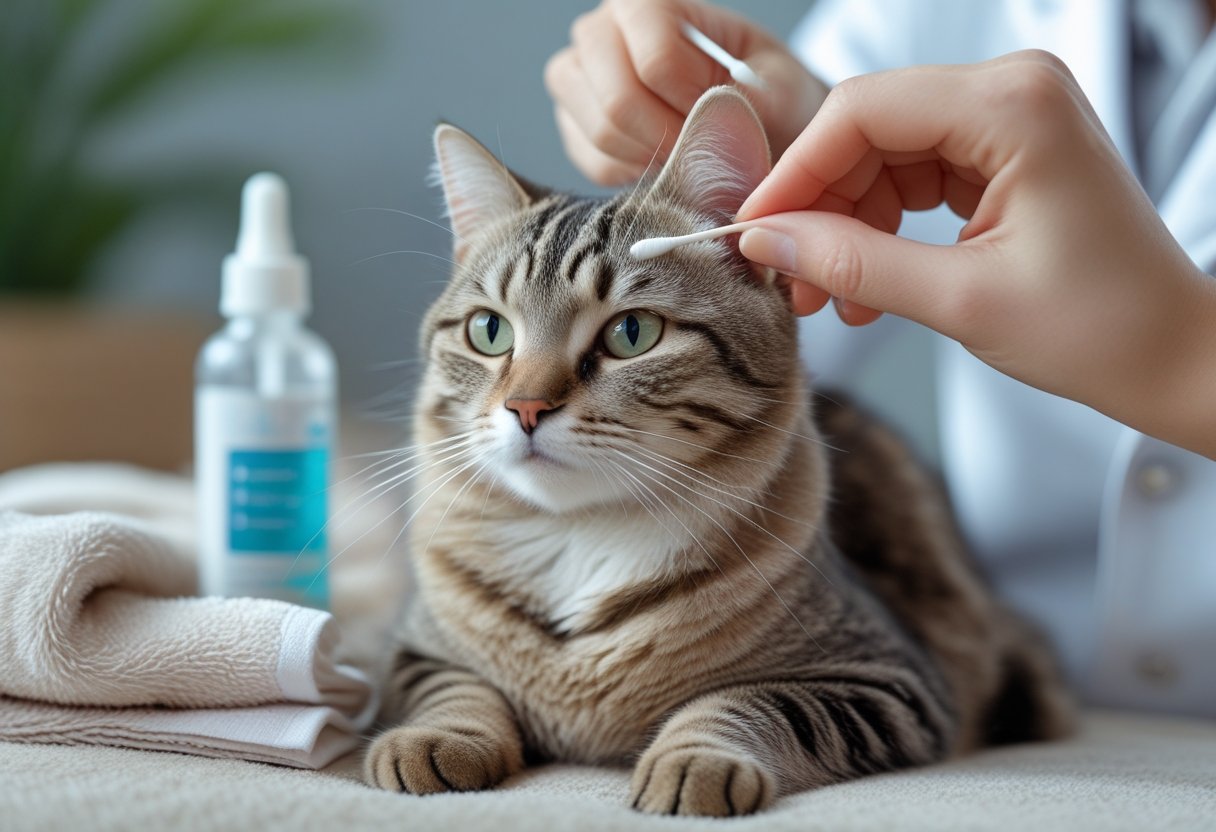
Always use a cat-specific ear cleaning solution. Do not use alcohol, hydrogen peroxide, or products made for humans, as they can harm your cat’s ears. Many pet stores and vets offer safe products labeled for cat ear cleaning.
Read the instructions on the bottle before starting. Most solutions tell you to apply a few drops into the ear canal. Make sure your cat’s ear cleaning solution does not contain any harsh chemicals.
If you are unsure which product to use, your vet can recommend something safe and effective. Using the right ear cleaner helps to break down wax and debris without irritating the ear.
For more product tips, visit this step-by-step guide to cat ear cleaning.
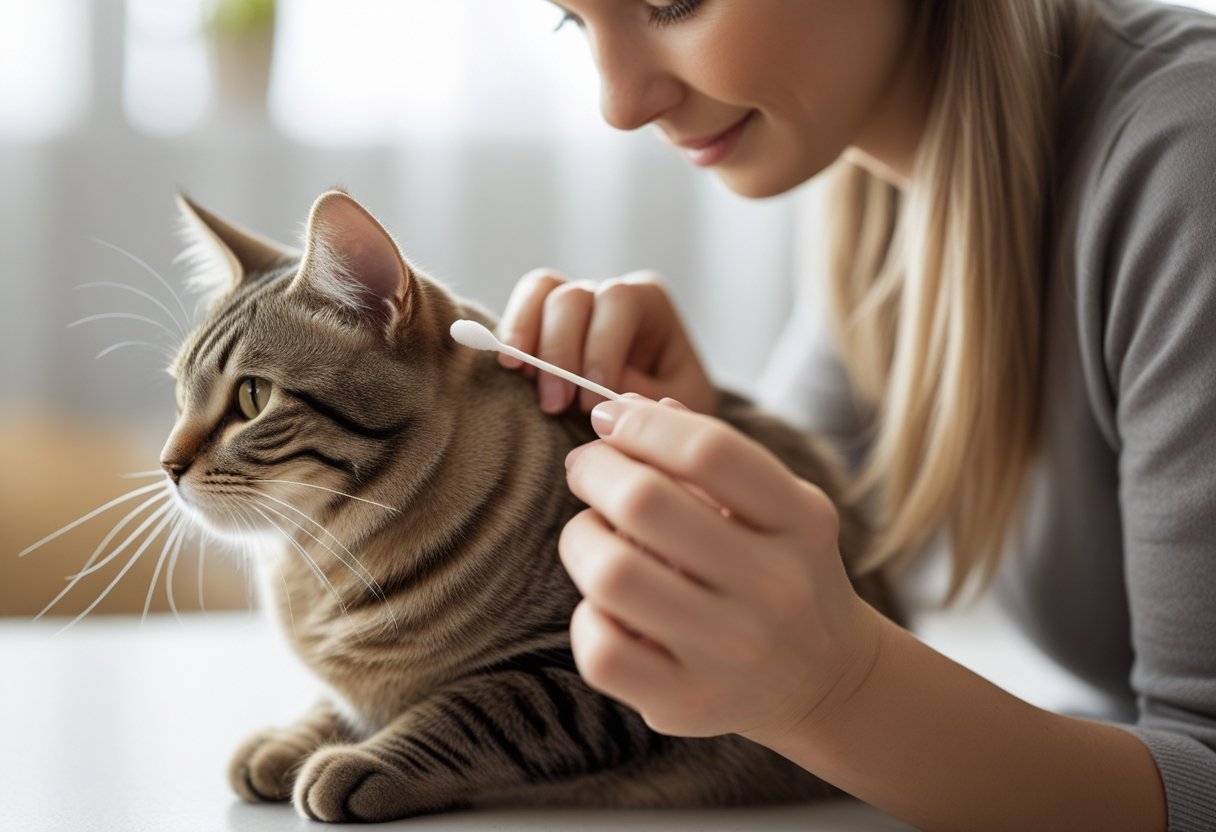
Hold the ear flap upright and gently squeeze the solution into the ear canal as directed. Massage the base of the ear for 15–20 seconds. This helps loosen debris and wax in the deeper part of the ear canal.
Most cats will shake their head after the massage, which helps move debris up to the ear opening. Use a cotton ball or pad to gently wipe away the loosened material from the outer ear and entrance of the ear canal. Avoid inserting anything deep into the ear canal. This can accidentally cause injury.
Dispose of each cotton pad after one use to avoid spreading dirt or infection between ears. If you notice a lot of discharge, discomfort, or if your cat’s ears seem painful, stop the cleaning and call your vet right away. Proper technique keeps your cat safe and helps maintain healthy ears.
Cats sometimes develop problems in their ears, such as infections or infestations, which can cause pain and discomfort. Knowing the signs and proper steps for when issues arise can protect your cat’s health and comfort.
Ear infections are not rare in cats and usually show obvious signs. Watch for symptoms like redness inside the ear, bad odor, swelling, or discharge. Your cat might shake its head often or scratch at the ears more than usual.
Otitis externa is a specific infection of the outer ear canal. It causes swelling and irritation. If you notice crusty debris or see your cat in pain when touching their ears, it might be this condition.
Regularly check your cat’s ears for any of these changes. Do not try to clean the ears yourself if you see these symptoms. Ear infections need medicine from a veterinarian who can diagnose the cause and suggest safe treatment. Read more about signs of infection and when to see a vet.
Ear mites are tiny parasites that live in or around the ear canal. They are highly contagious to other pets and can make life miserable for your cat. Common signs of ear mites include black or brown debris that looks like coffee grounds, intense scratching, or shaking the head.
Cats with ear mites often hold their ears flat to the head. You may also see hair loss around the ears from scratching. Young cats and kittens are especially at risk.
Ear mites need special medicine prescribed by a veterinarian. Cleaning alone will not remove mites or stop them from coming back. If you spot possible mites, keep your cat away from other pets until you can get veterinary care. For more details, visit this guide on cat ear hygiene.
Some ear problems need urgent help from a veterinarian. If you see blood, pus, or your cat is in obvious pain, do not touch or clean the ears.
Other warning signs include a tilted head, loss of balance, or a strong smell coming from the ears. These could mean a serious infection or that the problem has spread deeper into the ear.
Keep a list of symptoms to tell your vet. Bringing in photos of the ear can help the vet make a quicker diagnosis. Treating severe issues early is the best way to prevent long-term problems for your pet. If in doubt, it is always best to schedule a veterinary visit quickly.
Caring for your cat’s ears helps spot problems early and reduces the risk of infections. Small steps at home and regular checkups can keep your cat comfortable and healthy.
Check your cat’s ears every week. Look for changes like odor, redness, swelling, dirt, or wax buildup. Use a soft, damp cotton ball and only clean the ear flap and visible areas. Never insert cotton swabs into the ear canal, as this can push debris deeper or cause injury.
If the ears look dirty, clean only with a cat-safe, veterinarian-approved ear cleaning solution. For help choosing the right product, ask your vet or review advice from PetMD’s guide to ear cleaning. Stop cleaning and call your veterinarian if you see discharge, swelling, pain, or sores.
Keep track of any changes you notice, and tell your vet about them at your cat’s regular exams. They can check ear health and address any concerns before they become big problems.
Keep your cat indoors or supervise outside time to limit exposure to parasites and irritants. Check for fleas or ear mites, as these can lead to infections. If your cat scratches their ears a lot or shakes their head, schedule a vet visit since these can be signs of a problem.
Bathe your cat only as needed and dry ears thoroughly afterward. Avoid harsh chemicals, and never use hydrogen peroxide, which can irritate sensitive tissue as explained in this PetMD article.
If your cat has allergies or chronic health problems, talk to your vet about special care needs for their ears. Regular, gentle care helps catch problems early and supports your cat’s comfort and health.
Cleaning your cat’s ears requires careful technique, safe products, and attention to signs of infection or mites. Not every method is safe or recommended, and some products can cause harm if used improperly.
Use a vet-approved ear cleaning solution, such as Epi-Otic, and a cotton ball or gauze pad. Never use cotton swabs because they can push debris deeper or hurt your cat’s ear. Gently wipe only the loose wax and dirt you can see on the outer ear flap. Learn more about safe cleaning steps in this vet-approved guide.
You shouldn’t use natural remedies like vinegar, coconut oil, or essential oils to clean your cat’s ears. These products can irritate the delicate skin inside the ear or even cause serious problems. Only use cleaners that your veterinarian has recommended for your cat’s needs.
Do not use q-tips (cotton swabs) for cleaning inside your cat’s ears. Q-tips can push earwax and dirt further into the ear canal and may damage the eardrum. Clean with a cotton ball instead, focusing on the areas you can see, as explained by veterinary experts.
Most cats don’t need regular ear cleaning if they’re healthy. Check your cat’s ears during normal grooming. Clean them only if you see dirt or wax building up and your cat does not show signs of pain or infection. Overcleaning can irritate the ears. For more advice on timing, review these cleaning guidelines.
If your cat has black, crumbly debris inside the ears, frequent scratching, and shaking of the head, ear mites may be present. Ear mites need treatment from your veterinarian, not just cleaning, as they are a medical condition. Your vet may prescribe medication and will show you the best way to keep the ears clean during recovery.
Do not use water alone to clean your cat’s ears. Water can remain trapped in the ear canal and may cause infections. Only use vet-recommended ear cleaning solutions that are made for cats. These products are designed to break up wax while keeping your cat’s ears safe.